I explain this in the forums every so often.
Folks Create a VM, then a few Checkpoints. And before they know it they are in that horrific Paused-Critical state with their VMs.
All because they are running out of storage.
In the end, it comes down to many folks not really understanding how this happened in the first place.
It really goes back to the fact that Checkpoints use differencing disks. And each differencing disk has the potential of consuming as much disk space as its parent.
First of all; the warnings:
Be sure to only delete checkpoints through the Hyper-V Manager.
Do not attempt to manually delete AVHD files on the local file system.
Also, dynamic disks do not matter. Whether your VM began with a dynamic disk or a fixed disk makes no difference.
A dynamic disk just gives the illusion of consuming less space as the full potential of the disk is not realized.
But all differencing disks are dynamic, regardless if the parent was fixed or dynamic.
The root concept here is:
Each Checkpoint disk has the potential of consuming the maximum amount of disk space that its parent did.
For example: Say you make a VM with the default of a 127Gb dynamic virtual disk (you have the potential of consuming 127Gb of storage).
You install an OS and only 14Gb of physical storage is used.
You then take a Checkpoint. Now, you have the root 14Gb, and the potential to consume another 127Gb of additional storage.
Time passes and this Checkpoint consumes 50Gb of storage. 14 + 50 = 64Gb consumed.
You now take another Checkpoint. And all kinds of stuff happens in that VM OS.
You install Visual Studio create a database application, who knows.
And with all that the current state is now consuming 80Gb of Storage.
You have only increased the disk use by 30Gb.
But, with the Checkpoint tree in place you have now consumed 14 + 50 + 80 = 144Gb.
Beyond the 127Gb limit of the virtual disk.
Because of the potential of each Checkpoint being able to consume 127Gb (of VM disk change) all by itself.
Side by side with this is folks that use Checkpoints or differencing disks with the false idea that they will save storage. Over time, they save nothing and add complexity.
Unless you are doing test and are constantly tossing away VM disks and creating new ones, using differencing disks with the argument of reducing storage use is a very false assumption.
Showing posts with label Hyper-V. Show all posts
Showing posts with label Hyper-V. Show all posts
Wednesday, March 2, 2016
Thursday, August 20, 2015
Enabling Hyper-V causes continuous reboot
[updated 9/24/2015]
This is a post that I am getting out to pull together a symptom that I am seeing in the TechNet forums and is spread across multiple threads.
I will be updating this thread as I follow things unfolding. If you have this issue, please follow this post or the thread I mention below.
The current take aways:
A bit of background; Hyper-V takes advantage of hardware virtualization features.
As new releases come out it is not unusual for the platform to take advantage of some hardware feature that is not properly or fully implemented in hardware. This has played in historic releases.
Now, I am not being critical by pointing that out. What is am saying is this:
Step 1: check for BIOS updates from your system / motherboard manufacturer and update the BIOS.
As revealed in this thread: Windows 10 x64 Pro infinite reboot loop with Hyper-V enabled this pattern has played out again.
That said, iommu has (actually) been around for a long time. And, most likely has not been taken advantage of, so I can understand the recommendation of disabling it in the bootloader.
That said, when do you set it? Before or after enabling Hyper-V?
Did you update your BIOS?
As MSFT reports this issue to manufacturers, the BIOS update will become more relevant.
If you want to understand how important this is, search the Hyper-V forum for "Sony Viao" - Sony chose to release a system that reported chipset virtualization as being enabled, when in fact it was not.
Step 2: Check your network card drivers.
This one was a surprise. Now, the networking stack has been undergoing an overhaul over time. And in this release there are some big changes under the hood (that are pretty much hidden).
That said, recent reports are that rolling back to older versions of Network drivers can al alleviate this issue.
Here is the report from one recent poster in TechNet:
thanks for sharing your experience with Hyper-V on Windows 10 and the Broadcom wireless driver because it looks like you helped find a solution I could use in the meantime that does not crash/BSOD the Dell Precision M3800 laptop.
I used "Update Driver">"Browse My Computer">"Let me pick from a list of device drivers on my computer" to list the drivers on my machine and I happened to have a 6.x version of the driver already on my machine.
Specifically I changed drivers from/to:
-- Before -- "Dell Wireless 1560 802.11ac Version: 7.35.295.0 [7/30/2015]"
-- After -- "Dell Wireless 1560 802.11ac Version: 6.30.223.259 [11/28/2014]"
After picking the 6.x driver I reinstalled the Hyper-V role, created a Virtual Switch(had to do it twice) and added it to the imported VM. I've been working with it all day and haven't had a BSOD/crash yet.
This is interesting, as most likely, you got new drivers through the upgrade process. And MSFT most likely got them from Dell, or Broadcom, or Intel.
This said, Broadcom drivers do have a long and sordid history with Hyper-V and I generally stick with the in-box delivered drivers as those are usually the ones tested. But this entire upgrade process is new, and if the virtual switch existed prior to the upgrade it would have one set of capabilities (copied form the physical NIC) and the new driver would give a different set of capabilities. There is obviously some incompatibility here.
This is a post that I am getting out to pull together a symptom that I am seeing in the TechNet forums and is spread across multiple threads.
I will be updating this thread as I follow things unfolding. If you have this issue, please follow this post or the thread I mention below.
The current take aways:
- BIOS / chipset
- NIC / drivers
A bit of background; Hyper-V takes advantage of hardware virtualization features.
As new releases come out it is not unusual for the platform to take advantage of some hardware feature that is not properly or fully implemented in hardware. This has played in historic releases.
Now, I am not being critical by pointing that out. What is am saying is this:
Step 1: check for BIOS updates from your system / motherboard manufacturer and update the BIOS.
As revealed in this thread: Windows 10 x64 Pro infinite reboot loop with Hyper-V enabled this pattern has played out again.
This thread has been deleted for some reason. Unknown as to why or by whom.
There is a new hardware feature that has been implemented with Windows 10: IOMMU
According to Wikipedia, iommu is a memory management feature that is present in both Northbridge and Southbridge Intel processors.
Quite honestly, I see folks with i7's reporting this problem.
That said, I have long mentioned that manufacturers release processors in families. And within a family a feature may exist, but not across all processors in the family. So you must always check your particular chipset with the manufacturer to ensure that your chipset actually implemented the feature that you think you have.
Manufacturers do this so that they can offer a range of prices for end products. Be mindful of that.
I bring that up because I cannot tell you hoe many times I have helped folks wit an issue that turned out to be related to them thinking they have a feature (the motherboard implemented it) but the chipset actually lacked it (the particular processor they had didn't implement it, but the processor family did).
Now, here is the latest advice from MSFT folks:
There is a known issue where the machine will fail to boot when Hyper-V is installed but DEP/NX/XD is disabled in BIOS. You mentioned that you have enabled these options, but you are continuing to see the same problem.
One other thing we can try is disabling the IOMMU policy and see if that helps. (The hypervisor's usage of the IOMMU device by default is new in Windows 10, and might explain why you are seeing this only on Windows 10).
You can disable IOMMU usage by the hypervisor by running the following command from an elevated cmd window & rebooting your machine:
bcdedit /set {default} hypervisoriommupolicy disable
Can you try this and let me know if it helps?
If you can also share msinfo32 information with us, that will be helpful with the investigation.
- One poster reported resolution when they simply disabled Data Execution Prevention and enabled it again (this requires a cold boot).
That said, iommu has (actually) been around for a long time. And, most likely has not been taken advantage of, so I can understand the recommendation of disabling it in the bootloader.
That said, when do you set it? Before or after enabling Hyper-V?
Did you update your BIOS?
As MSFT reports this issue to manufacturers, the BIOS update will become more relevant.
If you want to understand how important this is, search the Hyper-V forum for "Sony Viao" - Sony chose to release a system that reported chipset virtualization as being enabled, when in fact it was not.
Step 2: Check your network card drivers.
This one was a surprise. Now, the networking stack has been undergoing an overhaul over time. And in this release there are some big changes under the hood (that are pretty much hidden).
That said, recent reports are that rolling back to older versions of Network drivers can al alleviate this issue.
Here is the report from one recent poster in TechNet:
thanks for sharing your experience with Hyper-V on Windows 10 and the Broadcom wireless driver because it looks like you helped find a solution I could use in the meantime that does not crash/BSOD the Dell Precision M3800 laptop.
I used "Update Driver">"Browse My Computer">"Let me pick from a list of device drivers on my computer" to list the drivers on my machine and I happened to have a 6.x version of the driver already on my machine.
Specifically I changed drivers from/to:
-- Before -- "Dell Wireless 1560 802.11ac Version: 7.35.295.0 [7/30/2015]"
-- After -- "Dell Wireless 1560 802.11ac Version: 6.30.223.259 [11/28/2014]"
After picking the 6.x driver I reinstalled the Hyper-V role, created a Virtual Switch(had to do it twice) and added it to the imported VM. I've been working with it all day and haven't had a BSOD/crash yet.
This is interesting, as most likely, you got new drivers through the upgrade process. And MSFT most likely got them from Dell, or Broadcom, or Intel.
This said, Broadcom drivers do have a long and sordid history with Hyper-V and I generally stick with the in-box delivered drivers as those are usually the ones tested. But this entire upgrade process is new, and if the virtual switch existed prior to the upgrade it would have one set of capabilities (copied form the physical NIC) and the new driver would give a different set of capabilities. There is obviously some incompatibility here.
Wednesday, July 1, 2015
A tale of containers
Containers. It is a word that we keep hearing about lately.
And in the popular vernacular a container refers to a "docker style container".
You say: "But Docker doesn't do containers" And, you are right.
These containers are what was originally known as (and still are) LXC containers and everyone associates with Docker .
Docker is not the container technology, Docker is container management and a container ecosystem. They only made containers easy.
Now, in the virtualization world folks have used this container word for a long time. It has been used to describe the isolation models themselves.
I really wish we had a better word for this type of container, other than 'container'.
With the modern Windows OS we have:
Now, 'container' containers.
A container is a bounded process that can contain processes.
A container is a file system boundary.
And, a container has its own networking stack.
A container shares the kernel and other processes with the machine on which it runs.
The processes in one container cannot see the process in another container.
Container processes interact with each other through the networking stack, just like applications on different machines are required to.
But, to be technical with the language; only the running process is a 'container'. When it is not running it is a container image.
And a container image is similar to an OS image. It has kernel, bootloader, files, and applications.
Now lets complex-ify all of this.
Linux currently has one type of container, LXC.
Windows is actually introducing two types of containers.
Images are another interesting aspect of containers.
If you have played with installing an application with Docker (such as creating a Docker build file) you begin with a base OS (preferably from a trusted source such as Canonical for Ubuntu). Then you layer on OS settings, and application downloads and installations.
In the end, you have this image. And this image is made up of chained folders, similar to the idea of checkpoints (VM snapshots or differencing disks).
However, in the container world, it is files and a file system. No virtual block devices as is said in virtualization circles. A virtual block device is a representation of a hard drive block layout. It is literally raw blocks, just like a hard drive.
Now, does this mean that since Canonical produces a 'docker' image for Ubuntu, that Microsoft will produce a 'docker' image for Windows Server? Most likely in some form.
Nano Server would make a neat base container image, Server Core as well.
Shell based applications would be a bit hairier. And a considerably larger base image since you have all of that Windows Shell in there.
But remember, a container image is a file base system. Now, just think about maintaining that image. The potential of swapping out one of the layers of the image to add an OS patch, or an application update. Not having to destroy, update, and deploy.
Oh, so exciting!
And in the popular vernacular a container refers to a "docker style container".
You say: "But Docker doesn't do containers" And, you are right.
These containers are what was originally known as (and still are) LXC containers and everyone associates with Docker .
Docker is not the container technology, Docker is container management and a container ecosystem. They only made containers easy.
Now, in the virtualization world folks have used this container word for a long time. It has been used to describe the isolation models themselves.
I really wish we had a better word for this type of container, other than 'container'.
With the modern Windows OS we have:
- Process containers: this is a process, it runs in its own memory space, it inherits a security context from either a user or the system, and it shares all aspects of the OS resources. If it has a TCP listener, it must be unique so it does not conflict with others, it has to use RAM nicely or it overruns other processes, and so on.
- Session containers: This is a user session. Enabled by the multi-user kernel. A session is a user security context container and within it are processes. The user is the security boundary.
- machine containers: This is a virtual machine. It can be likened to a bare metal installation. It is very heavy weight in that it is an entire installation. Within it run session containers and process containers. It is a very hard security boundary. It has a networking stack, it does not share resources (file system, RAM, CPU) but it can consume shared resources when running on a hypervisor.
Now, 'container' containers.
A container is a bounded process that can contain processes.
A container is a file system boundary.
And, a container has its own networking stack.
A container shares the kernel and other processes with the machine on which it runs.
The processes in one container cannot see the process in another container.
Container processes interact with each other through the networking stack, just like applications on different machines are required to.
But, to be technical with the language; only the running process is a 'container'. When it is not running it is a container image.
And a container image is similar to an OS image. It has kernel, bootloader, files, and applications.
Now lets complex-ify all of this.
Linux currently has one type of container, LXC.
Windows is actually introducing two types of containers.
- Windows containers - this type of container runs like a process on your workstation. It consumes your available RAM and CPU and a folder full of files. It smells like any application process, except; it has a network stack, and it cannot directly interact with other processes, it can only see its folder on the file system. It is a process in a can. Hence, container.
- Hyper-V containers - this type of container is just like the one above but with a more solid isolation boundary. It gets the benefit of hypervisor CPU and RAM management (fair share), it is forced to play well as a process. And, its meets isolation compliance standards just like a VM does. No shared OS, the image contains the kernel.
Images are another interesting aspect of containers.
If you have played with installing an application with Docker (such as creating a Docker build file) you begin with a base OS (preferably from a trusted source such as Canonical for Ubuntu). Then you layer on OS settings, and application downloads and installations.
In the end, you have this image. And this image is made up of chained folders, similar to the idea of checkpoints (VM snapshots or differencing disks).
However, in the container world, it is files and a file system. No virtual block devices as is said in virtualization circles. A virtual block device is a representation of a hard drive block layout. It is literally raw blocks, just like a hard drive.
Now, does this mean that since Canonical produces a 'docker' image for Ubuntu, that Microsoft will produce a 'docker' image for Windows Server? Most likely in some form.
Nano Server would make a neat base container image, Server Core as well.
Shell based applications would be a bit hairier. And a considerably larger base image since you have all of that Windows Shell in there.
But remember, a container image is a file base system. Now, just think about maintaining that image. The potential of swapping out one of the layers of the image to add an OS patch, or an application update. Not having to destroy, update, and deploy.
Oh, so exciting!
Tuesday, June 2, 2015
Linux VMs not getting IP with Hyper-V wireless external switches
For the past two days I have been building Ubuntu VMs on my laptop which runs Hyper-V.
I would install an Ubuntu VM, then try and update and discover that the VM has an IPv6 address but no IPv4 IP address.
So, off into the land of tweaking Ubuntu. No go.
Next, my kids report router problems. So I assume there is a correlation and I screw around with the router. No change.
I delete and re-create virtual switches. No Change.
After a bit of frustration and some calming attention to detail, I realize that the IPv6 address that my VM is getting is actually self generated, it was not getting it from my ISP (as I originally thought - since we do IPv6).
The one pattern is that; a virtual switch on the wired NIC always works with the VMs and the wireless doesn't.
The other pattern is that Windows VMs are just fine. It is only Linux.
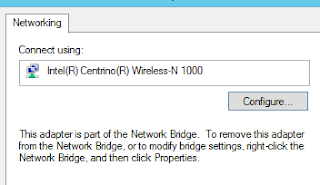
Now. Since this is an external virtual switch that includes a wireless NIC a Network Bridge device is added.


My thinking is; if Network Bridge is dependent on Wi-Fi, shouldn't it be after Wi-Fi?
(if you cluster or have clustered or have been around Windows as a server admin for a while you have probably messed with this before)

I would install an Ubuntu VM, then try and update and discover that the VM has an IPv6 address but no IPv4 IP address.
So, off into the land of tweaking Ubuntu. No go.
Next, my kids report router problems. So I assume there is a correlation and I screw around with the router. No change.
I delete and re-create virtual switches. No Change.
After a bit of frustration and some calming attention to detail, I realize that the IPv6 address that my VM is getting is actually self generated, it was not getting it from my ISP (as I originally thought - since we do IPv6).
The one pattern is that; a virtual switch on the wired NIC always works with the VMs and the wireless doesn't.
The other pattern is that Windows VMs are just fine. It is only Linux.
Now. Since this is an external virtual switch that includes a wireless NIC a Network Bridge device is added.

I decided to poke around a bit. I checked the properties of the Wi-Fi adapter (as it is common for power management to mess things up). I discover that I cannot edit the driver properties of the Wi-Fi adapter due to the Network Bridge.

If I open the properties of the Network Bridge, I can then disable Power Management on the NIC.
Come to find out tat was a waste of my time. But hey, I had to try it.
But, wait a minute. The bridge is dependent on the NIC. ... Network bindings pops into my head.
It used to be really easy to get into the bindings and totally mess things up. Needless to say, it is not so intuitive any longer.
At the Network Connections press the ALT key, this reveals the file menu - select Advanced and then Advanced Settings.
What I notice is that the binding order is: Network Bridge, Wi-Fi, Ethernet
My thinking is; if Network Bridge is dependent on Wi-Fi, shouldn't it be after Wi-Fi?
(if you cluster or have clustered or have been around Windows as a server admin for a while you have probably messed with this before)
So I decided to give it a shot and move the Network bridge after Wi-Fi.
I then reboot for the change to take effect.
I then attach a VM to the virtual switch on my wireless NIC, cross my fingers, and power it on.
The VM boots right up, no hang at networking. I logon, I type ifconfig and voila the VM has a proper network configuration. I run 'sudo apt-get update' and all is glorious and good.
Just to fun, I build a Generation1 VM and install the pfsence router into it.
That failed the auto configure test, but after reboot it came up just perfect (and it didn't prior). And the latest version has the integration Components built-in and can use synthetic virtual NICs instead of Legacy - and even reports the IP address to the networking tab in Hyper-V Manager (I love that).
So much pain and consternation, for what now feels like a binding order bug.
I will update this is anything changes, but in the mean time: It works!
Now, why might Windows VMs work just fine?
Because they keep trying to get an IP, they don't just try once at boot and then fail. So that network stack can come live at any time, in any order (and generally does late in the boot sequence).
Monday, February 23, 2015
Migrating VMs from Hyper-V 2008 or 2008 R2 to Hyper-V 2012 R2
There has been a recent explosion of questions around this in the Hyper-V TechNet forum over the past two weeks. So I decided that I would blog about this a bit.
The primary question is: How can I migrate from Hyper-V 2008 (or Hyper-V 2008 R2) to Hyper-V 2012 R2.
There are lots of very well meaning folks that provide the advice of: "Export your VMs from your 2008 era Hyper-V Server and then Import those VMs to your 2012 R2 Hyper-V Server."
Obviously, they never tested this. Because, IT DOES NOT WORK.
First of all, lets test this common advice: Export a VM from Hyper-V 2008 / 2008 R2 and import direct to Hyper-V 2012 R2.
And you look, and everything is right there in that folder. What gives!
The next piece of well meaning advice is to create a new VM configuration using the existing VHD in that export folder.
(this will work, but if you have snapshots you are screwed - all of that snapshot history is lost, and lots of folks connect to the incorrect virtual disk and freak out that years of history was lost.)
If you were going to do this in the first place, why not just copy out the VHDs and save yourself some effort and be done with it. This is viable option 1.
Here is the option that many folks overlook / are not aware of (as it was a new feature of Hyper-V 2012 R2:
Copy the VM folder direct from the Hyper-V 2008 R2 system to the Hyper-V 2012 R2 system and Import.
Hyper-V 2012 R2 reads the XML configuration and imports the VM asking you a couple questions to fix things up.
This is viable option 2 (actually the easiest if you have additional hardware with Hyper-V 2012 R2 already built).
We could stop there but not to be left without choices; you can in-place upgrade from your Hyper-V 2008 / 2008 R2 era system to Hyper-V 2012 and then again to Hyper-V 2012 R2. This will update the VM configurations as you go, and you will be all good. Now we have a viable option 3.
Suppose that all you have is a VM Export. Then what?
Remember that error message at the beginning; Hyper-V 2012 R2 cannot read the VM export from Hyper-V 2008 / 2008 R2. Now, we have other options.
Take your VM folder that you exported from your Hyper-V 2008 R2 system and copy it to a Hyper-V 2012 system. Then import. Success!
Now what? You want Hyper-V 2012 R2. You have a few viable options to take this from Hyper-V 2012 to Hyper-V 2012 R2:
In-place upgrade the Hyper-V 2012 system to Hyper-V 2012 R2. This is viable option 4.
Export the VMs, then import them to your Hyper-V 2012 R2 system. This is viable option 5.
Thinking out of the box, are there other options?
I am always assuming that you have backups of your systems. And you have tested restoring those backups, and you know those backups are indeed good and useful. This gives another option.
Restore your VMs to the Hyper-V 2012 R2 system as new VMs. This becomes viable option 6.
There you have it. Six options to test and choose from. All of which are considered supported. And will save you the panic of realizing that going straight from a Hyper-V 2008 / R2 VM Export to 2012 R2 will not work.
The primary question is: How can I migrate from Hyper-V 2008 (or Hyper-V 2008 R2) to Hyper-V 2012 R2.
There are lots of very well meaning folks that provide the advice of: "Export your VMs from your 2008 era Hyper-V Server and then Import those VMs to your 2012 R2 Hyper-V Server."
Obviously, they never tested this. Because, IT DOES NOT WORK.
First of all, lets test this common advice: Export a VM from Hyper-V 2008 / 2008 R2 and import direct to Hyper-V 2012 R2.
- Create your VM Export
- copy the export folder to a Hyper-V 2012 R2 system
- attempt to import.
And you look, and everything is right there in that folder. What gives!
The next piece of well meaning advice is to create a new VM configuration using the existing VHD in that export folder.
(this will work, but if you have snapshots you are screwed - all of that snapshot history is lost, and lots of folks connect to the incorrect virtual disk and freak out that years of history was lost.)
If you were going to do this in the first place, why not just copy out the VHDs and save yourself some effort and be done with it. This is viable option 1.
Here is the option that many folks overlook / are not aware of (as it was a new feature of Hyper-V 2012 R2:
Copy the VM folder direct from the Hyper-V 2008 R2 system to the Hyper-V 2012 R2 system and Import.
Hyper-V 2012 R2 reads the XML configuration and imports the VM asking you a couple questions to fix things up.
This is viable option 2 (actually the easiest if you have additional hardware with Hyper-V 2012 R2 already built).
We could stop there but not to be left without choices; you can in-place upgrade from your Hyper-V 2008 / 2008 R2 era system to Hyper-V 2012 and then again to Hyper-V 2012 R2. This will update the VM configurations as you go, and you will be all good. Now we have a viable option 3.
Suppose that all you have is a VM Export. Then what?
Remember that error message at the beginning; Hyper-V 2012 R2 cannot read the VM export from Hyper-V 2008 / 2008 R2. Now, we have other options.
Take your VM folder that you exported from your Hyper-V 2008 R2 system and copy it to a Hyper-V 2012 system. Then import. Success!
Now what? You want Hyper-V 2012 R2. You have a few viable options to take this from Hyper-V 2012 to Hyper-V 2012 R2:
In-place upgrade the Hyper-V 2012 system to Hyper-V 2012 R2. This is viable option 4.
Export the VMs, then import them to your Hyper-V 2012 R2 system. This is viable option 5.
Thinking out of the box, are there other options?
I am always assuming that you have backups of your systems. And you have tested restoring those backups, and you know those backups are indeed good and useful. This gives another option.
Restore your VMs to the Hyper-V 2012 R2 system as new VMs. This becomes viable option 6.
There you have it. Six options to test and choose from. All of which are considered supported. And will save you the panic of realizing that going straight from a Hyper-V 2008 / R2 VM Export to 2012 R2 will not work.
Thursday, February 12, 2015
Docker on Ubuntu on Hyper-V 2012 R2
I recently read through an MSDN article that described running Docker in a VM on Hyper-V.
Frankly, I was less than impressed at the complexity of the solution. Especially since the concept here is not a huge leap.
The basic steps are:
The model here is one VM per tenant. Thus forming that boundary and still getting the flexibility of both containers and VMs.
So, you want to setup Docker in a VM. There are a few steps as I am outlining this in gory detail. Here is goes:
Frankly, I was less than impressed at the complexity of the solution. Especially since the concept here is not a huge leap.
The basic steps are:
- Build a VM on Hyper-V
- Install Docker into that VM
- Run containers in that VM
- Your Docker containers are isolated within a VM.
The model here is one VM per tenant. Thus forming that boundary and still getting the flexibility of both containers and VMs.
- You can run the OS of your choice.
So, you want to setup Docker in a VM. There are a few steps as I am outlining this in gory detail. Here is goes:
- Install Ubuntu in the VM (14.04 LTS Server) or 14.10
- Add OpenSSH Server
- Determine IP
- Connect over SSH
- Update
- sudo apt-get update
- Upgrade the components (aka patch the OS)
- sudo apt-get upgrade -y
- Add Docker gpg key (that is 'qO' not 'qZero')
- sudo sh -c "wget -qO- https://get.docker.io/gpg | apt-key add -"
- Update the app list
- sudo sh -c "echo deb http://get.docker.io/ubuntu docker main\ >> /etc/apt/sources.list.d/docker.list"
- Update the local apt repository after adding the docker reference
- sudo apt-get update
- Install (latest) Docker (on 12/15/14 this is 1.4.0)
- sudo apt-get install lxc-docker -y
Now you are ready to play with the magic of Containers.
Friday, August 1, 2014
WAP Gallery Image, Dynamic IP address, and the SCVMM DHCP switch extension
Recently I had to put together a hands on lab for a number of sales engineers.
The lab involved SCVMM Service Templates, a custom Windows Azure Pack Gallery Image, and a Desired State Configuration module.
I had my environment of Hyper-V 2012 R2, SCVMM 2012 R2, and WAP about 95% configured. As much as I could and still support the students re-using my VMs with their own Hyper-V Server.
Since the lab was not about WAP, but instead about my gallery image, I wanted to keep it as simple as possible. I had a cloud, the cloud had a VM Network assigned, the students created a static IP pool.
(I already had an Internal Virtual Switch being created by SCVMM as a Logical Switch so that all lines of dependency were properly drawn)
In the WAP Admin portal - I had the students add the cloud and the VM Network to their plan.
I deploy my Gallery Image, and the domain join failed.
I look closer, and I see that my VM ended up with an APIPA address and not an address from the IP Pool.
Come to find out, the default behavior of a WAP Gallery Image is for dynamic IP address assignment.
Which, if you only ever deploy a gallery image to a Windows Network Virtualization VM Network, you will never notice. You will instead see that you get an IP from the IP Pool.
Something that I discovered long ago was that there is a custom Hyper-V Virtual Switch extension that ships with SCVMM. It is actually a DHCP responder. It catches the IP request, notifies SCVMM, and SCVMM responds with an IP from the SCVMM IP Pool assigned to the VM. Nifty.
But, this path only happens if the VM is attached to a Windows Network Virtualization (NVGRE) network managed by SCVMM.
Back to the default Gallery Image behavior of a dynamic IP address. No WNV network, no IP from an IP Pool. How to fix this?
The only way to fix this is to open the Resource Definition of the Gallery Image, and then open the Network Profile, then the NIC.
And change the AllocationMethod to Static.
 While you are in there, you will most likely notice a number of other interesting settings.
But the thing to be aware of is this, these are hard coded values, unless you work through making them settings that are actually exposed to your end customer (at this time you can't expose these settings).
If you change a setting here, that makes a dependency on an SCVMM placement rule, SCVMM will have to find a place that this VM can go to support all of the settings. If it cannot, your VM will not be deployed. And your tenant will call.
The lab involved SCVMM Service Templates, a custom Windows Azure Pack Gallery Image, and a Desired State Configuration module.
I had my environment of Hyper-V 2012 R2, SCVMM 2012 R2, and WAP about 95% configured. As much as I could and still support the students re-using my VMs with their own Hyper-V Server.
Since the lab was not about WAP, but instead about my gallery image, I wanted to keep it as simple as possible. I had a cloud, the cloud had a VM Network assigned, the students created a static IP pool.
(I already had an Internal Virtual Switch being created by SCVMM as a Logical Switch so that all lines of dependency were properly drawn)
In the WAP Admin portal - I had the students add the cloud and the VM Network to their plan.
I deploy my Gallery Image, and the domain join failed.
I look closer, and I see that my VM ended up with an APIPA address and not an address from the IP Pool.
Come to find out, the default behavior of a WAP Gallery Image is for dynamic IP address assignment.
Which, if you only ever deploy a gallery image to a Windows Network Virtualization VM Network, you will never notice. You will instead see that you get an IP from the IP Pool.
Something that I discovered long ago was that there is a custom Hyper-V Virtual Switch extension that ships with SCVMM. It is actually a DHCP responder. It catches the IP request, notifies SCVMM, and SCVMM responds with an IP from the SCVMM IP Pool assigned to the VM. Nifty.
But, this path only happens if the VM is attached to a Windows Network Virtualization (NVGRE) network managed by SCVMM.
Back to the default Gallery Image behavior of a dynamic IP address. No WNV network, no IP from an IP Pool. How to fix this?
The only way to fix this is to open the Resource Definition of the Gallery Image, and then open the Network Profile, then the NIC.
And change the AllocationMethod to Static.
But the thing to be aware of is this, these are hard coded values, unless you work through making them settings that are actually exposed to your end customer (at this time you can't expose these settings).
If you change a setting here, that makes a dependency on an SCVMM placement rule, SCVMM will have to find a place that this VM can go to support all of the settings. If it cannot, your VM will not be deployed. And your tenant will call.
Tuesday, July 22, 2014
Copying files into Hyper-V VMs with Copy-VMFile
Over the life of Hyper-V there have been lots of convoluted ways that folks have used to get files in and out of Hyper-V VMs.
The most common method has been to mount the VHD and copy files in and out. But you can't do this while the VM is running.
Then there the issue of using differencing disks or snapshots - and you want to replicate one file to many VMs. Folks try and mount the parent virtual disk and copy files in - but due to the way that differencing disks work, this gives mixed results if it works at all.
Well, Hyper-V has a nifty feature of the Integration Components / Integration Services that allows you to inject files into a running VM.
The PowerShell cmdlet is Copy-VMFile.
I recently stumbled on this while getting some labs set up and I suddenly realized that I have 25 lab machines with 4 VMs each that my students will be using, and I have a broken lab if I don't correct one file. Did I mention that I can't physically visit these servers? I only have remote access. What a pain.
Prior to being able to use the cmdlet you must have Guest Services enabled on your VM - and this is not on by default.
-CreateFullPath does just what you would think it does, it creates the folder path you defined if it is not already present.
Simple as that.
There is some safety built into this I will mention. Such as you cannot copy into the system path and other permissions blocks you will encounter.
Hyper-V has always approached the VM from the angle that it is evil, the VM is malicious. This is the protection assumption. Always keep that machine contained.
The most common method has been to mount the VHD and copy files in and out. But you can't do this while the VM is running.
Then there the issue of using differencing disks or snapshots - and you want to replicate one file to many VMs. Folks try and mount the parent virtual disk and copy files in - but due to the way that differencing disks work, this gives mixed results if it works at all.
Well, Hyper-V has a nifty feature of the Integration Components / Integration Services that allows you to inject files into a running VM.
The PowerShell cmdlet is Copy-VMFile.
I recently stumbled on this while getting some labs set up and I suddenly realized that I have 25 lab machines with 4 VMs each that my students will be using, and I have a broken lab if I don't correct one file. Did I mention that I can't physically visit these servers? I only have remote access. What a pain.
Prior to being able to use the cmdlet you must have Guest Services enabled on your VM - and this is not on by default.
Enable-VMIntegrationService -Name 'Guest Service Interface' -VMName DSC01Then, you can push a file into a VM from the Hyper-V Server by using -FileSource Host And the Host is the only option. You can only push in, not pullout.
Copy-VMFile -Name DSC01 -SourcePath .\1.2.0.0.zip -DestinationPath 'C:\Users\Public\1.2.0.0.zip' -FileSource Host -CreateFullPathYou use the -Force parameter if you are overwriting an existing file. And you don't need -Force otherwise.
-CreateFullPath does just what you would think it does, it creates the folder path you defined if it is not already present.
Simple as that.
There is some safety built into this I will mention. Such as you cannot copy into the system path and other permissions blocks you will encounter.
Hyper-V has always approached the VM from the angle that it is evil, the VM is malicious. This is the protection assumption. Always keep that machine contained.
Wednesday, June 18, 2014
Get more VM detail from Hyper-V
There was recently a question in the Hyper-V TechNet forum asking if there was a way to run the SCVMM Get-SCVirtualMachine cmdlet on a Hyper-V Server.
Well, technically yes; you install the SCVMM Console PowerShell module on the Hyper-V Server - I don't think that was the intent of the question.
What the individual was looking for is more information about the VM - since SCVMM (by default) returns a ton of information about a virtual machine.
This is status, linked object detail, owner, etc.
Now, all of this information comes from the SCVMM Server, and much of this detail is unique to SCVMM. At the same time, there is a lot more in Hyper-V than I think most folks realize, because it is filter output by default.
I am going to ignore SCVMM at the moment and focus on getting more from the in-box Hyper-V cmdlet.
Lets run through some examples:
PS C:\> Get-VM *
Name State CPUUsage(%) MemoryAssigned(M) Uptime Status
---- ----- ----------- ----------------- ------ ------
WAPDev Running 0 1580 4.20:34:51 Operating normally
myAdDns Running 0 879 4.20:34:55 Operating normally
Downloader Off 0 0 00:00:00 Operating normally
bjeSql Running 0 2749 4.20:34:52 Operating normally
PS C:\> Get-VM WAPDev | Format-List
Name : WAPDev
State : Running
CpuUsage : 0
MemoryAssigned : 1656750080
MemoryDemand : 1275068416
MemoryStatus : OK
Uptime : 4.20:37:01
Status : Operating normally
ReplicationState : Replicating
Generation : 2
Now, the individual in the forum post requested the following: "The SCVMM cmdlet Get-SCVirtualMachine returns a plethora of information regarding a VM. I would like to run this cmdlet on a Hyper-V host and get the same level of detail for each VM running on it. It appears that this is not possible."
Let me take my example one step further and show you one simple command that can give you everything about a VM. It is a command the simply tells the PowerShell cmdlet to return all properties of the VM, not the default filtered set. That is what the pipe to select * does.
And from here you can dig into the object and go off down some rabbit hole of dependencies such as NetworkAdapters, or the DVDDrives, or the HardDrives.
PS C:\> Get-VM WAPDev | Select *
VMName : WAPDev
VMId : 7ff0d548-1032-4cce-91ba-9a100a27b113
Id : 7ff0d548-1032-4cce-91ba-9a100a27b113
Name : WAPDev
State : Running
IntegrationServicesState : Up to date
OperationalStatus : {Ok}
PrimaryOperationalStatus : Ok
SecondaryOperationalStatus :
StatusDescriptions : {Operating normally}
PrimaryStatusDescription : Operating normally
SecondaryStatusDescription :
Status : Operating normally
Heartbeat : OkApplicationsHealthy
ReplicationState : Replicating
ReplicationHealth : Normal
ReplicationMode : Primary
CPUUsage : 0
MemoryAssigned : 1656750080
MemoryDemand : 1275068416
MemoryStatus : OK
SmartPagingFileInUse : False
Uptime : 4.20:39:47
IntegrationServicesVersion : 6.3.9600.16384
ResourceMeteringEnabled : False
ConfigurationLocation : E:\WAPDev
SnapshotFileLocation : E:\WAPDev
AutomaticStartAction : StartIfRunning
AutomaticStopAction : Save
AutomaticStartDelay : 0
SmartPagingFilePath : E:\WAPDev
NumaAligned : False
NumaNodesCount : 1
NumaSocketCount : 1
Key : Microsoft.HyperV.PowerShell.VirtualMachineObjectKey
IsDeleted : False
ComputerName : SWEETUMS
Version : 5.0
Notes :
Generation : 2
Path : E:\WAPDev
CreationTime : 11/22/2013 11:42:23 AM
IsClustered : False
SizeOfSystemFiles : 69268
ParentSnapshotId :
ParentSnapshotName :
MemoryStartup : 2147483648
DynamicMemoryEnabled : True
MemoryMinimum : 1073741824
MemoryMaximum : 1099511627776
ProcessorCount : 2
RemoteFxAdapter :
NetworkAdapters : {Network Adapter}
FibreChannelHostBusAdapters : {}
ComPort1 : Microsoft.HyperV.PowerShell.VMComPort
ComPort2 : Microsoft.HyperV.PowerShell.VMComPort
FloppyDrive :
DVDDrives : {DVD Drive on SCSI controller number 0 at location 1}
HardDrives : {Hard Drive on SCSI controller number 0 at location 0}
VMIntegrationService : {Time Synchronization, Heartbeat, Key-Value Pair Exchange, Shutdown...}
So, the next time you want to know more about your VM, or you want to do a relationship walk from the VM object to the dependent object - just remember to "select *" and return all properties of the VM to you $vm object. It takes longer, it works WMI harder, but it might get you where you are headed.
Once you know what you are looking for - using Get-VM, Get-VMMemory, Get-VMDVDDrive, Get-VMHardDisk, Get-VMSnapshots, etc. are actually faster - since they focus on the class of object and filter by that class.
Tuesday, April 29, 2014
Uninstalling software from Server 2012 R2 Core
Back a while ago I had a short post about uninstalling the SCVMM agent from Server Core.
That was an older version of Server and an older version of PowerShell.
Today, I had a reason to revisit that process. But now I have a bit more finesse with PowerShell and PowerShell is now in its v4 revision with Server 2012 R2.
And, needless to say, it is considerably simpler.
I am simply going to capture and paste my PowerShell screen and allow you to sort out the rest by reading through it. I think you will understand it simply enough.
PS C:\> Get-WmiObject -Class win32_product | ft
IdentifyingNumber Name Vendor Version Caption
----------------- ---- ------ ------- -------
{1D8E6291-B0D5-35EC-... Microsoft Visual C++... Microsoft Corporation 10.0.40219 Microsoft Visual C++...
{3834A905-5CC1-454D-... Microsoft System Cen... Microsoft Corporation 3.2.7510.0 Microsoft System Cen...
{A89BBF08-D933-4634-... Microsoft System Cen... Microsoft Corporation 3.2.7620.0 Microsoft System Cen...
PS C:\> Get-WmiObject -Class win32_product
IdentifyingNumber : {1D8E6291-B0D5-35EC-8441-6616F567A0F7}
Name : Microsoft Visual C++ 2010 x64 Redistributable - 10.0.40219
Vendor : Microsoft Corporation
Version : 10.0.40219
Caption : Microsoft Visual C++ 2010 x64 Redistributable - 10.0.40219
IdentifyingNumber : {3834A905-5CC1-454D-8CA4-AC449F12775D}
Name : Microsoft System Center Virtual Machine Manager DHCP Server (x64)
Vendor : Microsoft Corporation
Version : 3.2.7510.0
Caption : Microsoft System Center Virtual Machine Manager DHCP Server (x64)
IdentifyingNumber : {A89BBF08-D933-4634-8FBB-EB88F870981B}
Name : Microsoft System Center Virtual Machine Manager Agent (x64)
Vendor : Microsoft Corporation
Version : 3.2.7620.0
Caption : Microsoft System Center Virtual Machine Manager Agent (x64)
PS C:\> $installed = Get-WmiObject -Class win32_product
PS C:\> $installed[1].Uninstall()
__GENUS : 2
__CLASS : __PARAMETERS
__SUPERCLASS :
__DYNASTY : __PARAMETERS
__RELPATH :
__PROPERTY_COUNT : 1
__DERIVATION : {}
__SERVER :
__NAMESPACE :
__PATH :
ReturnValue : 0
PSComputerName :
PS C:\> $installed[2].Uninstall()
__GENUS : 2
__CLASS : __PARAMETERS
__SUPERCLASS :
__DYNASTY : __PARAMETERS
__RELPATH :
__PROPERTY_COUNT : 1
__DERIVATION : {}
__SERVER :
__NAMESPACE :
__PATH :
ReturnValue : 0
PSComputerName :
PS C:\> Get-WmiObject -Class win32_product
IdentifyingNumber : {1D8E6291-B0D5-35EC-8441-6616F567A0F7}
Name : Microsoft Visual C++ 2010 x64 Redistributable - 10.0.40219
Vendor : Microsoft Corporation
Version : 10.0.40219
Caption : Microsoft Visual C++ 2010 x64 Redistributable - 10.0.40219
PS C:\>
Wednesday, March 19, 2014
Setting Hyper-V default paths and migration settings with Desired State Configuration
Okay, now we are getting useful. Base configuration with Desired State Configuration.
But I will tell you, when I first looked at the modules I immediately wanted to configure default settings of the Hyper-V Server itself and that was totally lacking.
So I decided to spend a few days and create cVMHost – not all of the settings that I want, but enough to cover my needs on my test lab. You will find it on the PowerShell.org Git repository under DSC.
With it I open the following:
- Configure default VHD path
- Configure default Virtual Machine path
- Configure VM Migration
- Configure enhanced session mode
There are a few fail-safe features I added. Such as testing the paths, and validating that Hyper-V is there in case the dependencies are left out of the configuration. At the same time, I didn’t enable defining the migration network or the security model. I had to start with something useful, and I do have a day job so I could not make it too large.
So, just the xHyper-V – you download the cHyper-V and unzip it to C:\Program Files\WindowsPowerShell\Modules so that PowerShell will automatically load it.
To use it, here is a sample configuration that builds on my other two posts:
configuration Sample_cVMHost
{
WindowsFeature hypervRole
{
Ensure = 'Present'
Name = 'Hyper-V'
}
WindowsFeature hypervManagement
{
Ensure = 'Present'
Name = 'Hyper-V-PowerShell'
DependsOn = '[WindowsFeature]hypervRole'
}
Import-DscResource -module cHyper-V
PSHOrg_cVMHost hostSettings
{
VMHost = 'localhost'
Ensure = 'Present'
VirtualDiskPath = 'C:\users\public\VHDs'
VirtualMachinePath = 'C:\users\public\VMConfig'
VirtualMachineMigration = $true
EnhancedSessionMode = $false
DependsOn = '[WindowsFeature]hypervManagement'
}
Import-DscResource -module xHyper-V
xVMSwitch ExternalSwitch
{
Ensure = 'Present'
Name = 'VMs'
Type = 'External'
NetAdapterName = (Get-NetAdapter)[0].Name
AllowManagementOS = $true
}
}
Sample_cVMHost
Start-DscConfiguration -Wait -Verbose -Path .\Sample_cVMHost
And there you have it, you have migration enabled, and you could enable enhanced session mode, and you have new default storage paths since you could have an SMB share, or iSCSI storge or some big LUN sitting there that you want to default to.
And if you really want to get sneaky. Modify these settings prior to creating your VMs using the other xHyper-V modules.
Monday, March 17, 2014
Add a virtual switch to Hyper-V with Desired State Configuration
In my last post I was really simple, I added the Hyper-V Role and the Hyper-V PowerShell module to a Server 2012 R2 machine using the Server Manager Desired State Configuration provider (this is a capability that is provided in-box).
Lets step it up a bit.
In the community resources MSFT has released the xHyper-V Module as a component of the Desired State Configuration Resource Kit.
If you follow the instructions you will see that adding this to your Windows Server is as easy as:
- Download the xHyper-V module to the server that you are testing with
- unzip the package to C:\Program Files\WindowsPowerShell\Modules
- It should create a folder ‘xHyper-V’ under which you will find the necessary parts
- “ C:\Program Files\WindowsPowerShell\Modules\xHyper-V”
- including a DSCResources folder containing the classes of this module
- and the xHyper-V.psd1 file.
But that is all you need to do to add this, nothing more. You are done, simply begin using it. If you want to see that your server has ‘found’ the module; open your PowerShell command window and type Get-DscResource – you will see a list of all of the providers and modules.
Back to the xHyper-V module.. It includes resources for handling VMSwitches, VHDs, VMs, file directories, and VHD files.
If you think the module grouping is strange for the features, it just might be; a Resource Provider is designed to act upon a particular object beginning with ‘Present” and “Absent” and then most allow applying other properties to that object to extend it. And in a configuration multiple modules can be called to mix and match and produce a complete configuration.
In the previous article I only used one module – Server Manager. In this example I will use two. And in the next article I will use three and add more dependencies.
So, how do you use the VMSwitch class from the xHyper-V module? Just like before but with a little addition. Since VMSwitch is not an in-box resource provider, you actually have to tell the configuration to load it.
configuration Sample_cVMHost
{
WindowsFeature hypervRole
{
Ensure = 'Present'
Name = 'Hyper-V'
}
WindowsFeature hypervManagement
{
Ensure = 'Present'
Name = 'Hyper-V-PowerShell'
DependsOn = '[WindowsFeature]hypervRole'
}
Import-DscResource -module xHyper-V
xVMSwitch ExternalSwitch
{
Ensure = 'Present'
Name = 'VMs'
Type = 'External'
NetAdapterName = (Get-NetAdapter)[0].Name
AllowManagementOS = $true
}
}
Sample_cVMHost
Start-DscConfiguration -Wait -Verbose -Path .\Sample_cVMHost
Import-DscResource brings in the custom module named ‘xHyper-V’ to allow it to be used. Following that is a reference to xVMSwitch which is a member of that module. And ExternalSwitch is just my arbitrary name for this section.
One tricky thing that I am doing here – that I just decided to try on my own – is declaring that the first Network Adapter would be used for the switch. That is what (Get-NetAdapter)[0].Name does for me on the fly.
Since this is a required field for the resource provider and for the creation of an External Virtual Switch, I have to know what it is, and I don’t want to be bothered by testing it – my test machine has one NIC, I just want it to happen.
You could default this to the second NIC (Get-NetAdapter)[1].Name and remove the AllowManagementOS setting.
Now, you have a Hyper-V Server, with the PowerShell module, and an External Virtual switch using your first NIC that shares the management OS and is called ‘VMs’
Next time, another dependency, and my community provider – You can configure the default paths now…
Thursday, March 13, 2014
Basics of Hyper-V and Desired State Configuration
I am not sure how many posts I am going to write about desired state configuration. But lets begin with some basics with Hyper-V. Two posts from this, I will mention the DSC module that I have built for VMHost.
If you have been following – Desired State Configuration is a new feature that comes from the PowerShell team. It is a core feature that does what folks have been doing using agents for years.
You can do a number of nifty things from installation to configuration, putting files in a specific place, and more.
I really did not get excited about it until I wrote a Resource Provider, for my favorite Server Role – Hyper-V.
Now, you may know about the MSFT provided community modules for Hyper-V, Networking, WebAdministration, and Computer management. These add to the in-box capabilities of managing Role and Features, files, and a number of other things. If you have been paying attention you will also know that there is a PowerShell.org community DSC provider repository where folks are already adding to the MSFT ones.
I started looking at the Hyper-V modules and thought.. interesting. And then I immediately thought, but I want to modify the default configuration of the Hyper-v Server and it isn’t there.
So, I built the first version of a VMHost module.
But before we go there lets start with the basics.
Here is the scenario; you have Windows Server 2012 R2 (Full or Core) and you want to add the Hyper-V Role.
Open a PowerShell prompt locally on the server and apply the following:
configuration Sample_cVMHost
{
WindowsFeature hypervRole
{
Ensure = ‘Present’
Name = 'Hyper-V'
}
}
Sample_cVMHost
Start-DscConfiguration -Wait -Verbose -Path .\Sample_cVMHost
And watch.
What looks like a function named “Sample_VMHost” is a configuration . Executing the command that calls this configuration generates a MOF format output file in current path. And Start-DscConfiguration applies that configuration.
The –Wait and –Verbose let you watch the output of the Resource Providers under this all that are turning that configuration into reality.
After you reboot, you have the Hyper-V Role installed. But only the Hyper-V Role. That is not enough, lets add the Hyper-V PowerShell Module too.
So, open PowerShell again and apply this new configuration:
configuration Sample_cVMHost
{
WindowsFeature hypervRole
{
Ensure = 'Present'
Name = 'Hyper-V'
}
WindowsFeature hypervManagement
{
Ensure = 'Present'
Name = 'Hyper-V-PowerShell'
DependsOn = '[WindowsFeature]hypervRole'
}
}
Sample_cVMHost
Start-DscConfiguration -Wait -Verbose -Path .\Sample_cVMHost
Apply this and you will notice that it tests for the Hyper-V Role first, then adds the PowerShell provider.
That is what the DependsOn does. This feature, depends on that that other feature being enabled first. Otherwise, they all get applied at the same time. And notice how these are enforced as single things.
I just want to keep it simple for now. Enabling Roles and Features.
Wednesday, October 30, 2013
Modifying Hyper-V Generation2 VM boot device order with PowerShell
Yes, I know, some of you are looking at this and thinking, that has to be simple. Or, “just use the GUI”.
Well, I can tell you. The new Generation 2 VM introduces some interesting thinking to the world of Hyper-V.
First of all, let me drop this idea: resource references / resource definitions / resource paths – or as Hyper-V calls it “FirmwarePath”
Okay lets look at what we have.
In Hyper-V 2012 I used:
PS C:\Users\Foo> Get-VMBios gen2r2
Get-VMBios : A parameter is invalid. Generation 2 virtual machines do not support the VMBios cmdlets.  Use Get-VMFirmware and Set-VMFirmware instead.
Whoops. Not going to set that in the VM BIOS. And at least there is some good guidance in the error message though (I like that).
VMName SecureBoot PreferredNetworkBootProtocol BootOrderPS C:\Users\Foo> Get-VMFirmware gen2r2
------ ---------- ---------------------------- ---------
Gen2R2 Off IPv4 {File, Drive, Drive, Network}
Okay, easy enough. Before we just fed in a string and changed the order. But, before I do that, let me jsut avoid that error altogether and dig deeper.
PS C:\Users\Foo> $gen2r2 = Get-VMFirmware gen2r2
PS C:\Users\Foo> $gen2r2.BootOrder

VMName BootType Device                                       Description          FirmwarePath
------ -------- ------                                       -----------          ------------
Gen2R2 File                                                  Windows Boot Manager \HD(2,GPT14FD3F49-A5D7-4B1E-97EF-C...
Gen2R2 Drive    Microsoft.HyperV.PowerShell.HardDiskDrive    EFI SCSI Device      \AcpiEx(VMBus,0,0)\VenHw(9B17E5A2-...
Gen2R2 Drive    Microsoft.HyperV.PowerShell.DvdDrive         EFI SCSI Device      \AcpiEx(VMBus,0,0)\VenHw(9B17E5A2-...
Gen2R2 Network  Microsoft.HyperV.PowerShell.VMNetworkAdapter EFI Network          \AcpiEx(VMBus,0,0)\VenHw(9B17E5A2-...
Wait. Those are objects, device references. In the CIM world they are Resource References. Very interesting.
But, all I want is to set my VM to PXE boot.
And, I am going to do this the long hand way just for example – because the order has the be changed by feeding the objects in. I am assuming that bunches of you can sort that out in various ways and will gladly leave that in the comments. :-)
Lets capture the objects:
PS C:\Users\Foo> $genFile = $gen2r2.BootOrder[0]
PS C:\Users\Foo> $genNet = $gen2r2.BootOrder[3]
PS C:\Users\Foo> $genHD = $gen2r2.BootOrder[1]
PS C:\Users\Foo> $genDVD = $gen2r2.BootOrder[2]
Now, lets set those back, in the order I want them
PS C:\Users\Foo> Set-VMFirmware -VMName Gen2R2 -BootOrder $genNet,$genFile,$genHD,$genDVD
PS C:\Users\Foo> Get-VMFirmware gen2r2

VMName SecureBoot PreferredNetworkBootProtocol BootOrder
------ ---------- ---------------------------- ---------
Gen2R2 Off        IPv4                         {Network, File, Drive, Drive}
Let me see snazzy ways that you script this to change the boot order.
(BTW - VMM 2012 R2 does not let you do this)
Monday, October 7, 2013
Exporting the VHD of a running VM with Hyper-V 2012
A co-worker recently asked me about how to clone / export a running VM on Hyper-V 2012.
My first reply was; “upgrade to Hyper-V 2012 R2 and it is built-in”.
Unfortunately that didn’t meet his needs, he is stuck in the Hyper-V 2012 world for a bit.
I came up with a process, it is not a pretty process, that is within all the parameters of file locking, doing things the way that you ‘should’, etc.
The key thing to wanting to ‘clone’ or export a VM is that you really want the virtual disk. That is the ‘state’ of the machine. The settings are easily copied and relatively incidental, the most important part is the virtual disk.
I say that because this entire convoluted process is all about getting a very clean virtual disk state. In this entire process, the settings of the machine (CPU, RAM, dynamic memory, virtual switch attachment, etc.) don’t matter. And in the real world (outside of my little perfect test world) they really don’t matter until you Import.
Enough rambling on. So, what is this process anyway? In a nutshell it is:
If you take a snapshot of a VM, you can then add a differencing disk to the parent disk of the snapshot, create a VM from that, export that VM, then destroy the VM, then destroy the differencing disk.
Because this is not a snapshot, with the export Hyper-V gives you the differencing disk plus the parent.
If you exported a snapshot you get a single virtual disk, since Hyper-V does special things with AVHDX files.
If you want a single file, then you merge the diff that is in the export.
I know that some of my blog readers dream in command line, so here comes the PowerShell.
Special note: This is specific to Hyper-V 2012 and works because of live merging and the built-in PowerShell provider. Hyper-V 2012 R2 does not need all this mess, just take a snapshot and Export. Hyper-V 2008 or 2008 R2 does not have a built-in PowerShell provider, but you could do all this with WMI.
 $vm = get-vm "datest"

# I always want 'now' so we take our own snapshot
$checkPoint = Checkpoint-VM -VM $vm -SnapshotName "clone" -Passthru

# Create a differencing disk and link it to the disk of the snapshot.
$diffVhd = New-VHD -Differencing -ParentPath $checkPoint.HardDrives[0].Path -Path ("D:\Test\" + $checkPoint.Name + ".vhdx")

# If you really care about the exact configuration of your VM and want to Import it on the other side, then do the configuration only export using WMI:  http://blogs.msdn.com/b/virtual_pc_guy/archive/2010/03/24/performing-a-configuration-only-export-import-on-hyper-v.aspx
# on the Import side you would 'fix-up' the configuration and use the merged new disk from later on in this example.  http://itproctology.blogspot.com/2012/08/handling-import-vm-errors-in-server.html

$clone = New-VM -Name $checkPoint.Name -VHDPath $diffVhd.Path

Export-vm -VM $clone -Path D:\Test -Passthru

Remove-VM -VM $clone -Force
Remove-Item $diffVhd.Path

$vhds = Get-ChildItem -Path D:\test -Recurse -File -Include "*.vhd*" | Get-VHD

foreach ($vhd in $vhds) {
    if ($vhd.VhdType -eq "Differencing") {
        $parent = Get-Item $vhd.ParentPath

        Merge-VHD $vhd.Path -Force
    }
}
I am going to mention it again. I am using the Export process to get a clean virtual disk, not to have a proper VM configuration.
Use Ben’s Configuration Only export to get the configuration XML. Then on Import use the Fix-up methodology to point to the new VHD.
Sounds like I need a second blog to put this all together.
Thursday, September 12, 2013
PowerShell to enable Remote Desktop for Administration on the local machine
I had a teammate request that I enable Remote Desktop for Administration as a portion of my SCVMM Service Template.
You cannot script sconfig – although that is a easy manual way to do it.
If you try any of the Server 2012 cmdlets you will end up mucking with Remote Desktop Services and enabling user access.
Well, it turns out the key is a key. And it is easiest to tweak it with WMI.
The following script runs on the server that is being modified (localhost is the default). And it can run using administrator or local system security credentials.
try {
    $RDP = Get-WmiObject -Class Win32_TerminalServiceSetting `
                        -Namespace root\CIMV2\TerminalServices
                        # -Computer $Computer `
                        # -Authentication 6 `
                        # -ErrorAction Stop
} catch {
    "WMIQueryFailed"
    continue
}
if($RDP.AllowTSConnections -eq 1) {
    "RDP Already Enabled"
    continue
} else {
    try {
        $result = $RDP.SetAllowTsConnections(1,1)
        if($result.ReturnValue -eq 0) { "Enabled RDP Successfully" }
        if ($result.ReturnValue -eq 4096) {
                $Job = [WMI]$Result.Job
                while ($Job.JobState -eq 4) {
                    Write-Progress -Id 2 -ParentId 1 $Job.Caption -Status "Executing" -PercentComplete $Job.PercentComplete
                    Start-Sleep 1
                    $Job.PSBase.Get()
                }
        }
    } catch {
        "Failed to enable RDP"
    }
}
Wednesday, August 28, 2013
PowerShell to test if a network connection is up and on the domain
If you have noticed I have been spending a lot of time working with deployments, deploying, and scripting configurations.
In fact, I have spent nearly two years, off and on, working on this in various ways and permutations from Windows Azure VMRole (the now dead non-persistent one) to SCVMM Service Templates.
The thing that makes this type of scripting unique is that the scripts are executed within the OS of the VM, not externally from some manager that uses a PowerShell remoting session or the like.
This means that each script has no knowledge of anything beyond the boundaries of the OS where the script is running.
Now, I assume that many of you are aware of the Hyper-V Synthetic Nic, and that the Synthetic NIC driver comes to life later in the boot process (not in 2012 R2 generation 2 VMs, but that is different).
The problem is one of timing. Your script could be running prior to your network being awake an functional.
Here is a little script that I use to test my domain joined machines prior to continuing when I have a need for domain connectivity (such as executing a command using a domain credential).
If you want to take this to the next level and identify the IP address and physical NIC (say you have multiple NICs and you need to bind to the IP of the domain NIC or the NIC itself in some configuration.
In fact, I have spent nearly two years, off and on, working on this in various ways and permutations from Windows Azure VMRole (the now dead non-persistent one) to SCVMM Service Templates.
The thing that makes this type of scripting unique is that the scripts are executed within the OS of the VM, not externally from some manager that uses a PowerShell remoting session or the like.
This means that each script has no knowledge of anything beyond the boundaries of the OS where the script is running.
Now, I assume that many of you are aware of the Hyper-V Synthetic Nic, and that the Synthetic NIC driver comes to life later in the boot process (not in 2012 R2 generation 2 VMs, but that is different).
The problem is one of timing. Your script could be running prior to your network being awake an functional.
Here is a little script that I use to test my domain joined machines prior to continuing when I have a need for domain connectivity (such as executing a command using a domain credential).
Do { $upTest = ( Get-NetConnectionProfile | where {$_.IPv4Connectivity -ne "NoTraffic"} ) } until( $upTest.NetworkCategory -eq "DomainAuthenticated" ) If you want to take this to the next level and identify the IP address and physical NIC (say you have multiple NICs and you need to bind to the IP of the domain NIC or the NIC itself in some configuration.
$mgmtNetProfile = Get-NetConnectionProfile | where {$_.NetworkCategory -eq "DomainAuthenticated" }  # Assuming only one NIC is domain joined.
$mgmtNetIpAddress = Get-NetIPAddress -InterfaceIndex $mgmtNetProfile.InterfaceIndex -AddressFamily IPv4
Thursday, July 25, 2013
Disabling the BIN save state file on Hyper-V
This is a follow-up to my post: http://itproctology.blogspot.com/2013/07/the-forgotten-bin-element-in-hyper-v.html
Over time I have seen lots of posts from folks wanting to turn this off.
Well, that became possible with Hyper-V 2012. And actually is totally hidden, you might not know you are turning it off.
First, on the previous post I mentioned why the BIN (as I refer to them as the save state file) exist in the first place.
So, what if you turn them off?
Well, you turn them off and you lose the protection they offer. The safety net if you like. Think about that, consider the risk. I did my job and warned you.
Before we jump in and disable it let's look at the settings option related to it first.
Per this post by Ben Armstrong this is rather simple; http://blogs.msdn.com/b/virtual_pc_guy/archive/2012/03/26/option-to-remove-bin-files-with-hyper-v-in-windows-8.aspx
Set-VM -AutomaticStopAction Save
This is the default and what you get without thinking. The safety net is on.
Set-VM -AutomaticStopAction ShutDown
This will cause Hyper-V to attempt clean shut down of the VM or click it off if it can't
Set-VM -AutomaticStopAction TurnOff
This will just click off your VMs, and give you that wonderful "why did I not shutdown cleanly" dialog later on.
According to Ben’s post; if you set either ShutDown or TurnOff, Hyper-V no longer creates the BIN file as a placeholder.
Now, if you take a snapshot of a running VM, you get one as a part of the snapshot (it is the actual saved memory state, not a placeholder). But it won't be there from the moment you turn on your VM.
In case you didn’t know how to use Set-VM: Get-VM –Name “Foo” | Set-VM –AutomaticStopAction ShutDown
Now, what if you want something a bit more useful, or you have bunches of VMs?
If you are using SCVMM:
Import-Module virtualmachinemanager
$prefix = Read-Host "Enter prefix to search on"
$vms = get-scvirtualmachine | where {$_.name -match $Prefix}
foreach ($vm in $vms) {
# check if its status is clean in VMM, and clear it if not
if ($vm.Status -eq "UpdateFailed") {Repair-SCVirtualMachine -VM $vm -Dismiss}
if ($vm.VirtualMachineState -eq "Running") {Stop-SCVirtualMachine -VM $vm -Shutdown}
# wait for the darn thing to cleanly shut down
Do {Start-Sleep 30} until ($vm.VirtualMachineState -eq "PowerOff")
if ($vm.StopAction -ne "ShutdownGuestOS"){Set-SCVirtualMachine -VM $vm -StopAction ShutdownGuestOS}
if ($vm.StartAction -ne "TurnOnVMIfRunningWhenVSStopped"){Set-SCVirtualMachine -VM $vm -StartAction TurnOnVMIfRunningWhenVSStopped}
}
With the Hyper-V cmdlets the script would be changed very little.
If you are using Hyper-V cmdlets:
$prefix = Read-Host "Enter prefix to search on"
$vms = get-vm | where {$_.name -match $Prefix}
foreach ($vm in $vms) {
if ($vm.State -eq "Running") {Stop-VM -VM $vm}
# wait for the darn thing to cleanly shut down
Do {Start-Sleep 30} until ($vm.State -eq "Off")
if ($vm.AutomaticStopAction -ne "ShutDown"){vm | set-vm -AutomaticStopAction ShutDown}
if ($vm.AutomaticStartAction -ne "StartIfRunning"){$vm | set-vm -AutomaticStartAction StartIfRunning}
}
The forgotten BIN element in Hyper-V Storage planning
This is an issue that VDI deployments always run in to.
The symptom is this: I deployed bunches of VDI VMs. Folks begin using them. And a week goes by. Suddenly I notice that most all the reserve storage that I had planned on is gone.
I don’t have any snapshots happening. I check that the backup software isn’t leaving weird VSS backups or temporary files lying around. I even look for AVHDs (though I know there should not be any).
So what happened?
I go looking around and I see all these .BIN and .VSV files.
The VSV is a small placeholder.
However, the BIN is equal in size to the amount of RAM that the running VM is consuming. If you have Dynamic Memory enabled, it equals the amount of Assigned Memory – so it changes.
Therefore, Dynamic Memory on, means that you design for the worst case scenario – calculate for the Maximum Memory setting of all the VMs stored on that particular LUN.
What this will cause you to do is:
- Realize the impact that this BIN file has on storage.
- Be smart about setting the Maximum Memory of your VMs.
- Understand the risk and accept the risk and push forward without making any considerations.
If you have read this far you might be thinking, What is this BIN file for anyway?
It is a safety net for your VM(s).
It is a placeholder that reserves storage on the file system, so that if the hypervisor needs to reboot, it can quickly dump the memory of your VM(s) to disk.
This does not help you if the hypervisor crashes due to something like a bad driver, this is Hyper-V being able to respond to something and save your VMs – Oh, such as when you run out of storage and it puts your VMs into a saved state. That is one use.
Tuesday, May 21, 2013
Enabling Network Virtualization using SCVMM Run Script Command
So, if you are in the Fabric node of SCVMM 2012 SP1 you might happen to right click on a Hyper-V Server and notice the option “Run Script Command”.
This is great, it lest me push commands out to my Hyper-V Servers and run them, just like I do with Application Scripts in Service Templates.
I recently ran into a situation where I needed to enable the Network Virtualization binding on all of my Hyper-V Servers (seven of them). And I had no desire to open a PSSession to each and run my script block that enables it.
Since I discovered this Script Command option in SCVMM, why not use it, I am here.
Like any good SCVMM admin I defined the command and then looked at the PowerShell script behind it.
(The big problem here is that I don’t see a way to save these Script Commands and run them again. Big fail there.)
I then took that script and made it a bit more useful to me by getting all of my Hyper-V hosts and running my command on all of them at the same time.
And I figured that ‘why not’ this is the one step that all the SCVMM Network Virtualization setup is missing. Frankly, I would expect SCVMM just to do this for me, but alas SP1 does not.
Here is my execution:
import-module virtualmachinemanager
$scriptSetting = New-SCScriptCommandSetting
Set-SCScriptCommandSetting -ScriptCommandSetting $scriptSetting -WorkingDirectory "" -PersistStandardOutputPath "" -PersistStandardErrorPath "" -MatchStandardOutput "" -MatchStandardError ".+" -MatchExitCode "[1-9][0-9]*" -FailOnMatch -RestartOnRetry $false -AlwaysReboot $false -MatchRebootExitCode "" -RestartScriptOnExitCodeReboot $false
$RunAsAccount = Get-SCRunAsAccount -Name "DomainAdmin"
$VMHosts = Get-SCVMHost | where { $_.VirtualizationPlatform -eq "HyperV" }
$scriptBlock = {
$vSwitch = Get-VMSwitch -SwitchType External
ForEach-Object -InputObject $vSwitch {
if ((Get-NetAdapterBinding -ComponentID "ms_netwnv" -InterfaceDescription $_.NetAdapterInterfaceDescription).Enabled -eq $false){
Enable-NetAdapterBinding -InterfaceDescription $_.NetAdapterInterfaceDescription -ComponentID "ms_netwnv"
}
}
}
ForEach ($VMHost in $VMHosts) {
Invoke-SCScriptCommand -Executable "%WINDIR%\System32\WindowsPowerShell\v1.0\PowerShell.exe" -TimeoutSeconds 120 -CommandParameters "-ExecutionPolicy RemoteSigned -command $scriptBlock" -VMHost $VMHost -ScriptCommandSetting $scriptSetting -RunAsAccount $RunAsAccount
}
Be sure to have the SCVMM Console installed, and modify your RunAs account name.
That Set-SCScriptCommandSetting line is all about the error handling for the script. The only non-default setting I have in here is making sure that my hypervisors were not rebooted, no matter what happened.
Subscribe to:
Posts (Atom)